Install and setup MySQL on macOS (intel/ apple-silicon)


There are two ways to setup install and setup MySQL on a macOS system
There are two ways to install and setup MySQL on a macOS system
Homebrew
Native macOS installer (DMG) from MySQL's official website
** Note: Please follow the steps in sequences to avoid any kind of error or trouble.
Step 1: Using Homebrew
This process is fast and simple to implement and also supports the true spirit of a Developer because you are using a terminal i.e. CLI 😎
Open your terminal and start following the steps.
** If you are already done these steps in the past i.e. having homebrew and Xcode installed in your system please avoid these two steps.
Install Xcode:
xcode-select --install
Install Homebrew:
/bin/bash -c "$(curl -fsSL https://raw.githubusercontent.com/Homebrew/install/HEAD/install.sh)"
Update Homebrew:
brew update
Install the MySQL:
brew install mysql
It takes a few minutes to install, please wait patiently and drink some water.
After installation, it will show something like this on your terminal.
We've installed your MySQL database without a root password. To secure it run:
    mysql_secure_installation

MySQL is configured to only allow connections from localhost by default

To connect run:
    mysql -uroot

To start mysql:
  brew services start mysql
Or, if you don't want/need a background service you can just run:
  /opt/homebrew/opt/mysql/bin/mysqld_safe --datadir=/opt/homebrew/var/mysql
Congratulations 🫡 you have successfully installed your SQL database in the form of MySQL Database.
Now you are good to go and start using the MySQL database directly through CLI or even we can use MySQL-workbench (community version) from the official website.
MySQL-workbench provides the GUI interface for the database to use MySQL database.
** My recommendation will be to use CLI instead of GUI interface but if you want to take help from it for visualization.
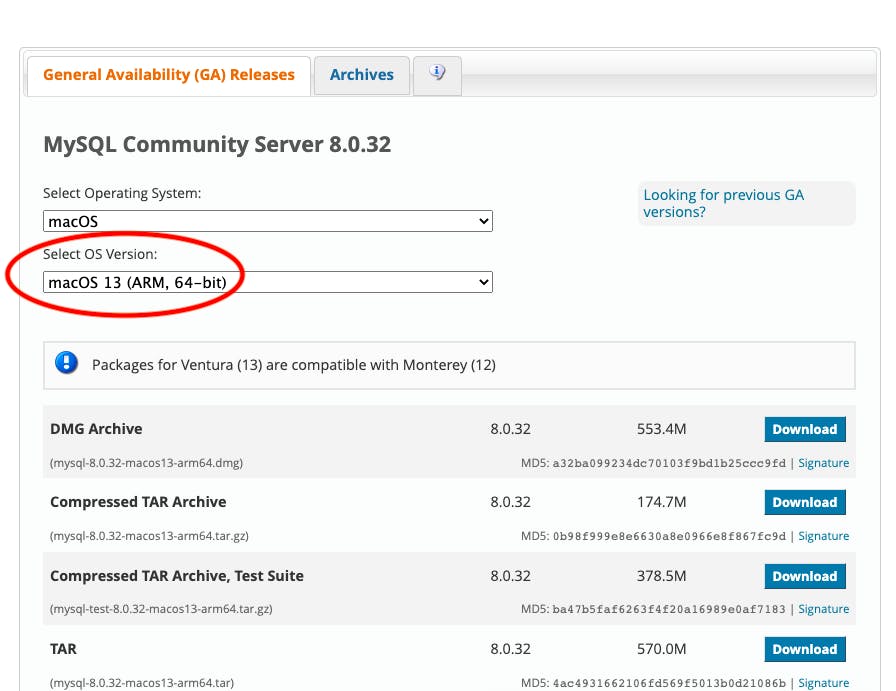
Step 2: MySQL dmg file (for mac) from the Official website.
case 1: For mac Apple Silicon chip system users i.e. M1, M2 or above
then download from ARM-based versions.
For the new macOS ARM(Apple silicon's chip) download link.
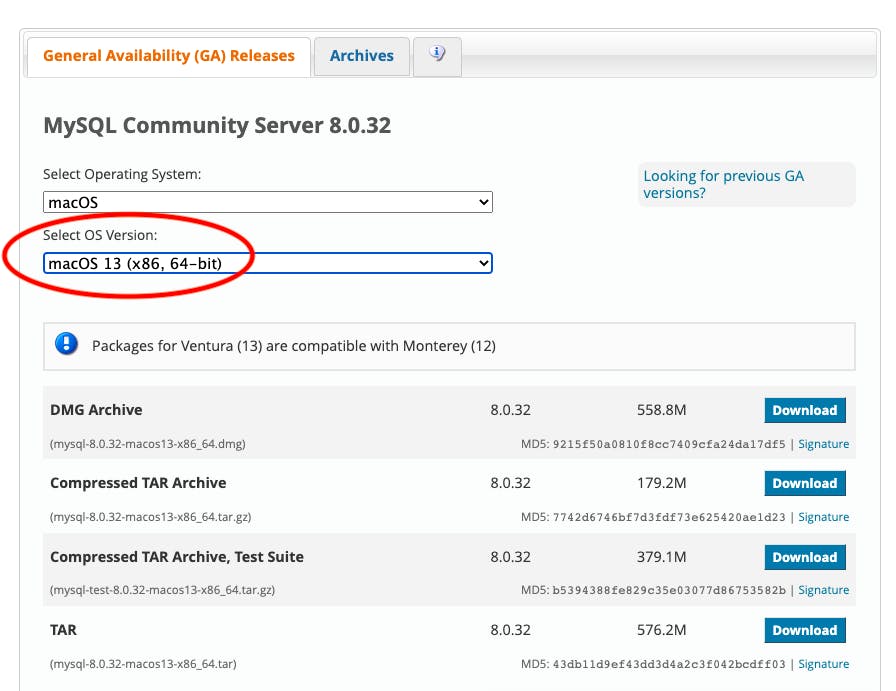
case 2: For mac intel x86 chip system users i.e. older systems of macOS intel processor-based system.
then download from macOS 13 (x86, 64bits)
**Note: Packages for Ventura (13) are compatible with Monterey (12)
For macOS intel-based user download link.
Now once it is downloaded unzip it it will be installed in your system automatically and you are good to go to start using it.
Congratulations 🫡 you have successfully installed your SQL database in the form of MySQL Database.
:::::::::::::::::::::::: Troubleshooting::::::::::::::::::::
**** If you face any kind of problem please don't panic just go and use homebrew because it contains the latest and open-source version of MySQL which will be compatible with your system as well, homebrew takes care of it.
(homebrew ?? it's a package manager for macOS and it will help you even in future with a lots of different software). *****
Now you can start your process of using and implementing MySQL database.
Start MySQL:
brew services start mysql
This is confirmed by giving you a message:
Successfully started `mysql` (label: homebrew.mxcl.mysql)
Connect to MySQL:
Now connect with the MySQL database server
mysql -uroot
Once connected, you should see something like this:
MySQL [(none)]>
You can now go ahead and start using MySQL.
Here’s an example of a quick command you can use to see a list of databases:
show databases;
Result:
+--------------------+
| Database           |
+--------------------+
| information_schema |
| mysql              |
| performance_schema |
| sys                |
+--------------------+
4 rows in set (0.007 sec)